

Hi Folks,
MadHookUp here. I am going to start off by telling you a little about myself. I have been playing UT since the Demo came out. I was never a hard core player, just played for fun. Never tried to get any better. My first clan ever was UNO, they wound up changing their names to DOJ. We were pretty much all new to UT, and the clan died. I am happy to say though, DOJ is back again. I joined Zombie Battalion |ZB| after DOJ died. Made some really good friends, was Leader for about a year while |ZB|Mr.Grimm was out. I wound up leaving because I didnt like the direction ZB was headed in, and most of my friends in ZB retired. Soon after joined Alliance – A][ becacause I had so many friends in the clan. A][ changed its name back to its old school name of Masters of the Shadowed Realm – MsR. About a year ago while I was in ZB I really tried to improve my game and with the help of |ZB|IronMonkey aka Digital Overlord he showed me a number of things that really improved the way I played. Many of the top players know tweaks, settings, and keybinds that help them play UT, and I would like to make them all available to all of UT. Its not fair that some players/clans know this information while others dont. I dont want to come off as an expert, I far from know everything about UT. Just going to share some useful information that was passed on to me. The information in here will help new players to the game, mediocre players, and some things in here many of the top players dont even know.If you get anything helpful from this, I would love to hear from you! You can either email me at themhu@madhookup.com, or you can post on my fourm.
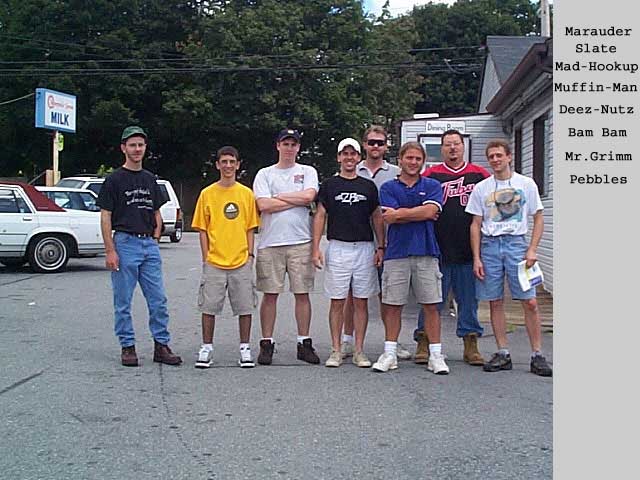
Here is a Picture with the ZB guys From the Lan Party
Practicing
Its pretty obvious that practice makes perfect. In my opinion the 2 MOST important qualitys of a good UT player is dodging and shocking. You will find that the best players can dodge well, and do shock combo’s well. When I first played UT I hated the Shock Rifle because people would beat my ass with it. I thought they should remove the gun. Then I decided that for an entire day I would use nothing but shock. I became good with the weapon and I am now a shock whore ;-). Practice all weapons! Dedicate an entire day to playing with just 1 weapon! When you learn to play well with all the weapons, it will make a huge difference! Try to play on UT servers with just Ladder maps. Its better to play maps that you will be playing on ladders, and servers that play with just ladder maps commonly attract the best players/competition to play against. When eating dinner, or just bored, hop on a server as a spectator. And just watch the guys with highscores, you can learn a lot of tips and secrets.
Settings
First off, If you have weapon auto switch on, TURN IT OFF! When the enemy has your flag you need to chase him down, but at the same time pick up weapons on the way. Every second counts. If you keep auto-switching between trans locator and a weapon your in trouble.
World Texture Detail – Low
Skin Detail – High
– Both of these are just preferences. I think people stand out more like this.
Use Dynamic Lighitng – yes
– With this on you will have a glow under your shock ball that can help you judge distance for combos.
View Bob on the lowest setting
– Less obstruction of view, less distraction
Dodging better be turned on!
Weapon Flash off
– When weapon flash is on, and you are shooting off that minigun of yours, it practically blinds you
Use Hardware 3D Sound – Off
Use Surround Sound – Off
– This will impact Frame Rates
Autotaunts off
– they are gay and distracting, real men do the taunting themselves. This also allows me to know who is talking shit on me 😉
Display
Weapon Show – Another thing I was told is that the top players don’t have their weapon showing. They want to be able to see as much as possible on their screen. This I was totally against. I was like, “How much more can you actually see.” After playing like this, I will never go back. If you follow all my tips, I will explain why you don’t need to see your weapon. Its like when people lose one of their senses and their others senses get better. People that are blind, can hear better. When you take weapon show off, you will hear what weapon you pull out and you will be able to look at the bar at the bottom as well. Now if you follow my tips, you will always know what weapon you have anyway through keybinds I will give you. I will tell you those later.
Crosshair
This is mostly preference. Iron told me that he uses a pink dot. Pink because no maps use that color, it stands out compared to the other colors. Other people said that doing a moving shock combo is much easier with a bigger crosshair. I find that to be completely true. A bigger crosshair makes shock combos much easier, but I still prefer the dot. Its shocking how something as minor as a crosshair affects your game. You will learn that if you apply all these little changes it will make you a better player.
New Crosshairs

Look for the following in your user.ini file…CrosshairCount=9
CrossHairs[0]=Botpack.CHair1
CrossHairs[1]=Botpack.CHair2
CrossHairs[2]=Botpack.CHair3
CrossHairs[3]=Botpack.CHair4
CrossHairs[4]=Botpack.CHair5
CrossHairs[5]=Botpack.CHair6
CrossHairs[6]=Botpack.CHair7
CrossHairs[7]=Botpack.CHair8
CrossHairs[8]=Botpack.CHair9
CrossHairs[9]=
CrossHairs[10]=
CrossHairs[11]=
CrossHairs[12]=
CrossHairs[13]=
CrossHairs[14]=
CrossHairs[15]=
CrossHairs[16]=
CrossHairs[17]=
CrossHairs[18]=
CrossHairs[19]=
replace it with….
CrosshairCount=20
CrossHairs[0]=Botpack.CHair1
CrossHairs[1]=Botpack.CHair2
CrossHairs[2]=Botpack.CHair3
CrossHairs[3]=Botpack.CHair4
CrossHairs[4]=Botpack.CHair5
CrossHairs[5]=Botpack.CHair6
CrossHairs[6]=Botpack.CHair7
CrossHairs[7]=Botpack.CHair8
CrossHairs[8]=Botpack.CHair9
CrossHairs[9]=cerberus.c1
CrossHairs[10]=cerberus.c2
CrossHairs[11]=cerberus.c3
CrossHairs[12]=cerberus.c4
CrossHairs[13]=cerberus.c5
CrossHairs[14]=cerberus.c6
CrossHairs[15]=cerberus.c7
CrossHairs[16]=cerberus.c8
CrossHairs[17]=cerberus.c9
CrossHairs[18]=cerberus.c91
CrossHairs[19]=cerberus.c92
FOV – Field of View
Ok, FOV will change your game. FOV stands for field of view. I would have to say that 75% of UT players don’t know they can change this setting. To change your FOV, you go into console and type “FOV 90, FOV 100, etc.” IronMonkey uses a FOV of 130. Many people find that insane. Let me try and explain what FOV does before describing the advantages and disadvantages. I weird way of thinking of it, is like this. When you change your FOV, you change where your eyes are locate on your head. FOV 90 is human. Most people that play UT, like 100 rather then 90 when they try it. Going over 100 takes some time getting used to. So lets say you choose a 130 FOV, how does this differ from 90? Basically you are taking your eyeballs, and moving them out more towards the side of your head, like a fish. Pro’s and Con’s. The advantages are this. You can see more on either side of you. Picture Hydro if you will. Say you are in your base standing next to your flag. To your left you will see the Plasma gun, to your right you will see the boxes near the rocket launcher. With a FOV of 90 you can only see 1 entrance. It takes at least a FOV of 120 to see both. Just by increasing your FOV, you can now see both entrances. That is one advantage of using a higher FOV. But most people, including me, will tell you that they don’t use a high FOV just to see more. Changing your FOV makes the game play seem SOOOO much faster. It feels like someone increased the game speed, makes it much more exciting. Basically I like it better because it makes the game faster. There is a downside though. By increasing the vision on the sides of your head, you are shrinking your vision straight in front of you. Looking down long maps such as Thornz can be difficult. It also makes people harder to hit with weapons such as Primary shock, and Sniper because your target is a little smaller. Like I said before, the game speed alone makes me like it so much better. Just an FYI, if you use a FOV over 100, your HAVE to turn off view weapon, it will distort the weapon and get in the way. Those of you reading this that has never tried a different view may go and try changing it now. The night I changed my FOV I was playing with like 10 different ZB members just for fun on our server. I was on the phone with Iron. He told me over and over, he said you are going to hate it at first, but try it out. So I did. As we played that night I was getting completely owned. I totally sucked ass. I had a lot of trouble getting used to the FOV of 130. But he kept telling me to stick with it. If it weren’t for Iron on the phone with me, I would have just ignored him and played with 90. I was playing with all the ZB guys, and I looked like a n00b. But seriously, try it. From my learning experience with FOV, this is the easiest way to get used to it. Turn your FOV to 150. NOW THAT IS WEIRD! But basically make the FOV 150 and play for an hour. Then change it 140. Then to 130. Play with 130 for an hour. Then go back to 90. Wanna bet money you will go straight back to 130? I know I did. Going back to 90 feels like you are playing in slow motion. Its awful. I really ask you guys to try it. Many people that actually gave 130 an honest effort either loves it, or went something like 110-115-120. I have to say though, 100 is a must! Don’t use 90 anymore. Again this is preference, but it helped my game a lot.
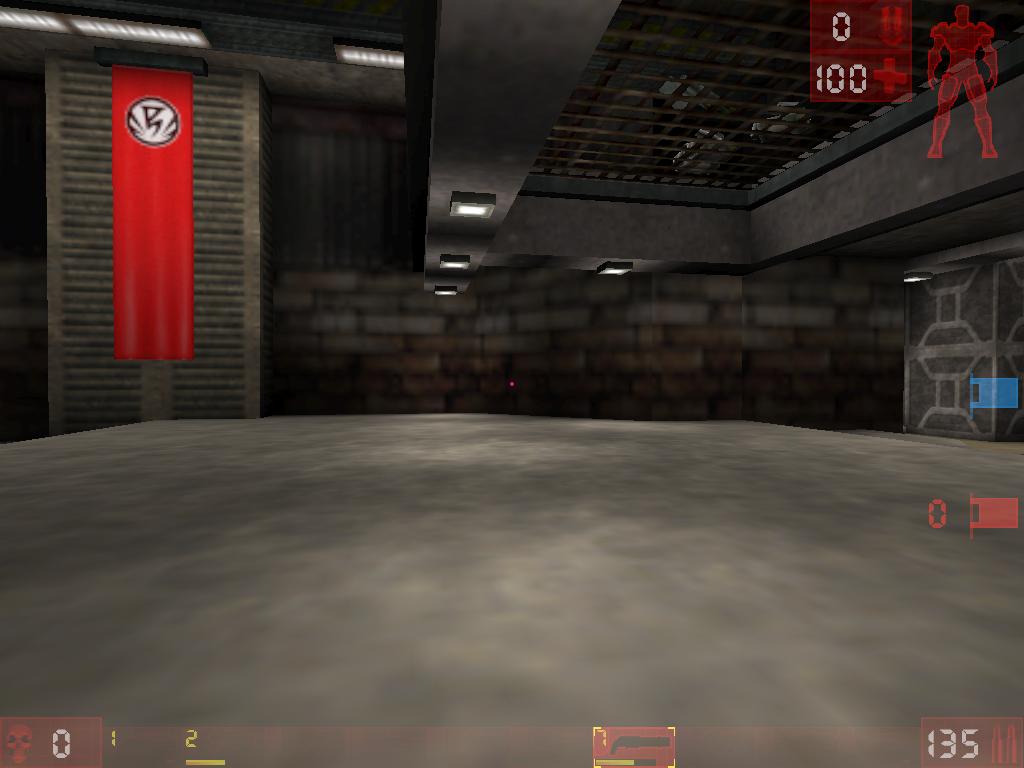
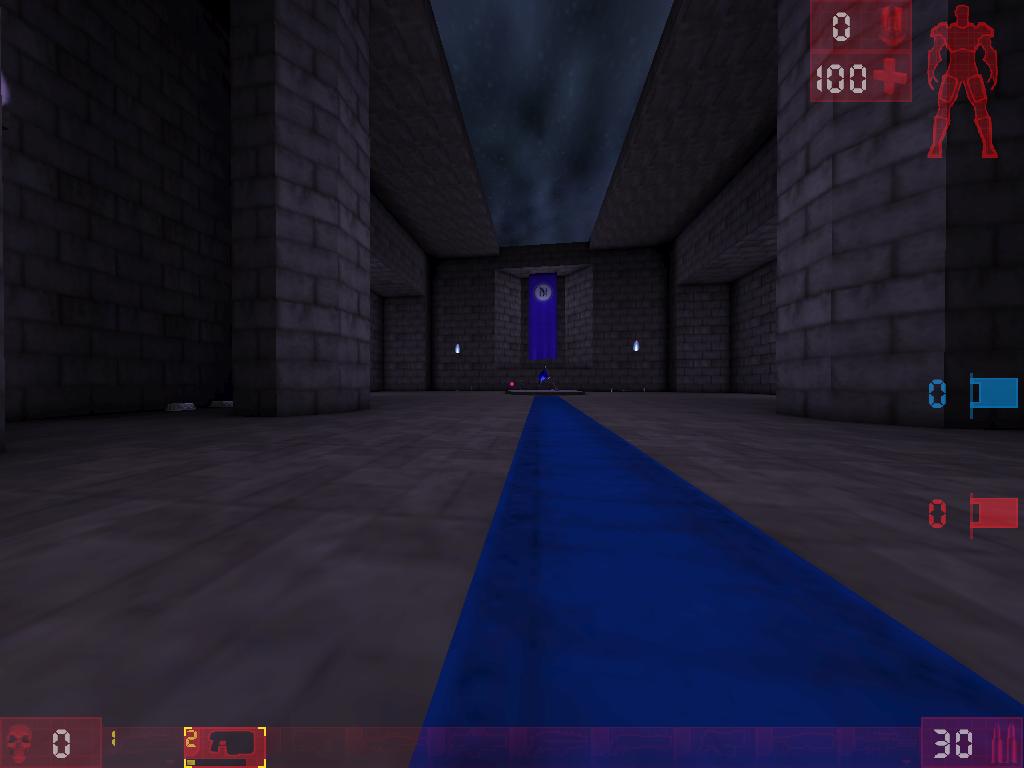
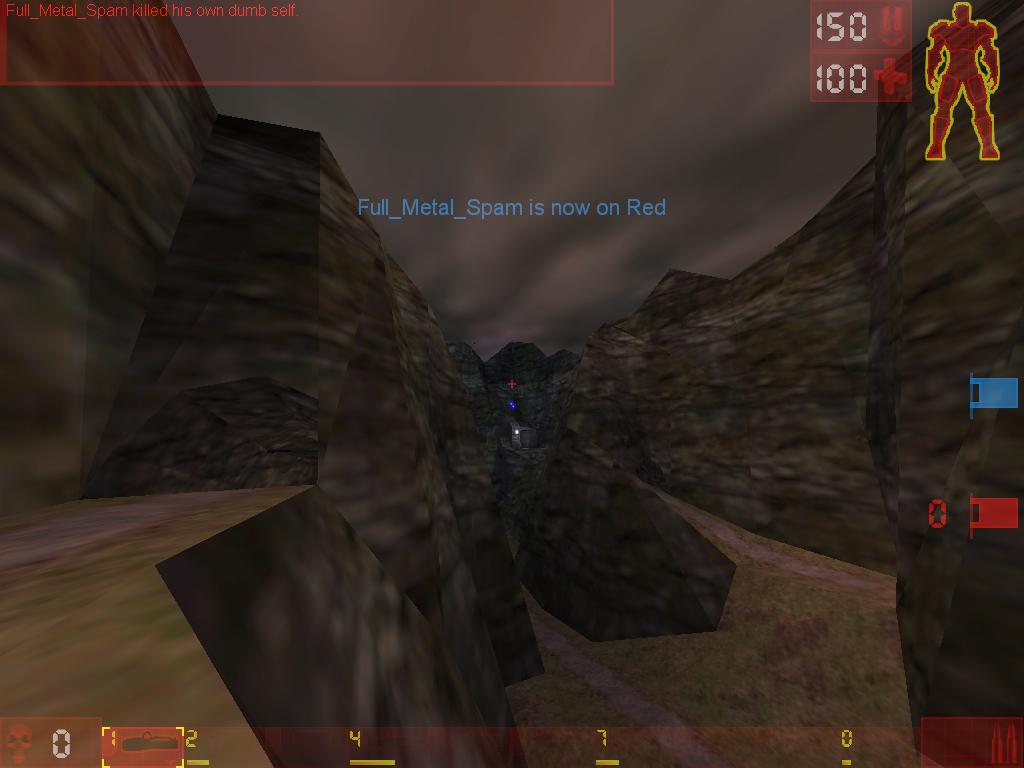
Here is FOV 90
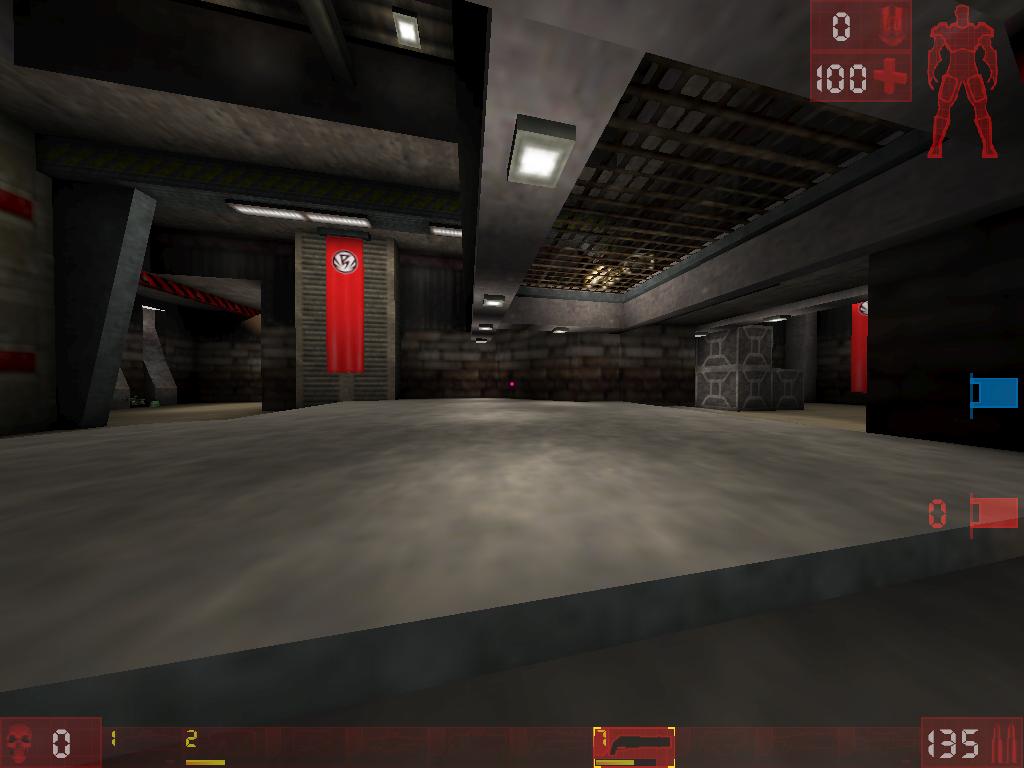
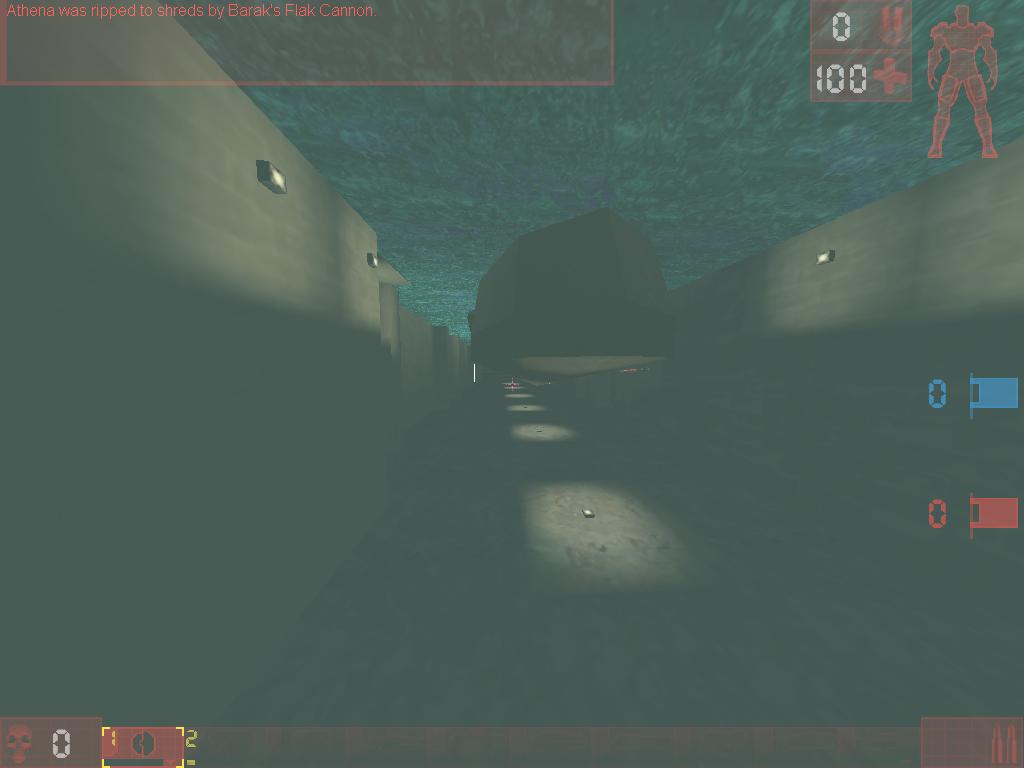
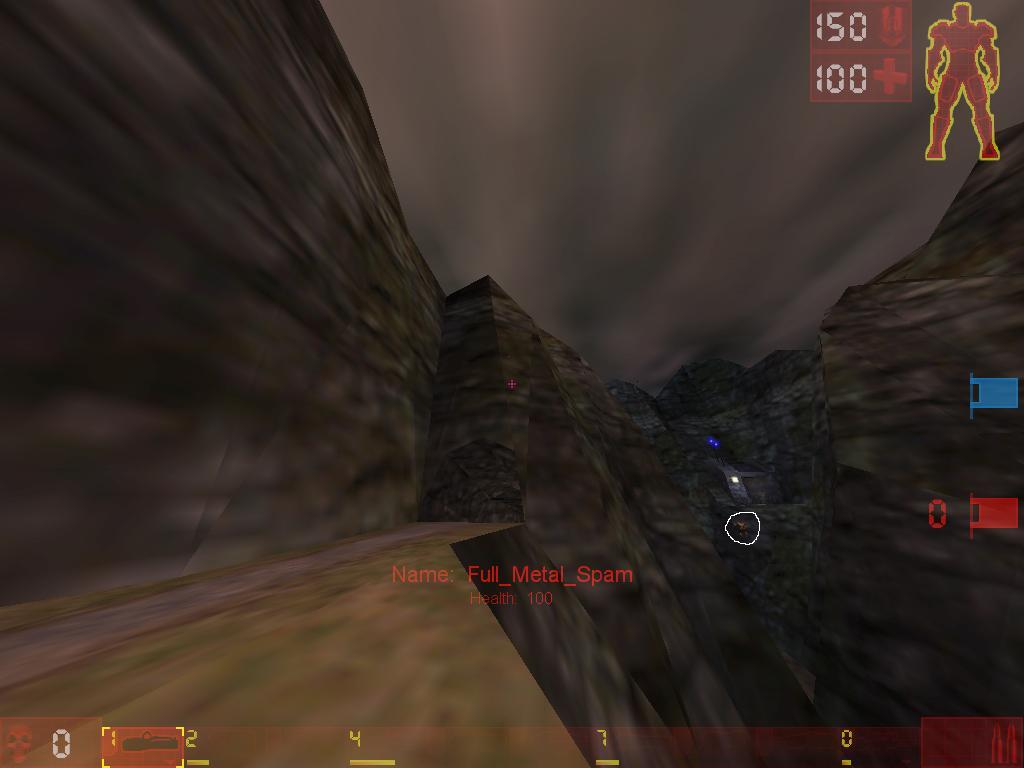
Fov 130
Here is the disadvantage to using FOV of 130. This is what Thornz looks like at 90. Notice the enemy next to the flag.
And this is what it looks like with a FOV of 130, you can see that people directly in front of you are noticeably smaller.
Key binds
Like many people I have dreamt about the 8+ button mouse. Sadly this doesn’t exist. You always want more buttons near your fingers. I use the arrow keys to move. “a,s,d,w” are much better though because you have more keys within reach. I don’t want to switch for a couple reasons. I have my letters keys binded to phrases such as k=teamsay The 100% Keg is open. I use this to tell my team if I see the keg, or to let my main FC know, so he can get it. s=teamsay Shield Belt is open. And so on. I use the number pad to the right as commands. Such as Take their flag, defend the base, somebody get our flag back, incoming, enemy FC is here, back me up! I like my setup, but I wanted to give you a visual so you understand where I am going.
I use the Logitech MX700. Any scroll mouse can have 2 extra mouse buttons added ;-). Many people do not do this, but it’s a must! You need to bind weapons to keys! Binding weapons to keys will also help you when you have show weapon off. Now most players don’t use the ripper, bio, hammer, and pistols as weapons. Maybe last resorts. So why do you need the scroll part? Most of the top players already have their weapons binded to certain keys. Think to yourself, how often do you use the scroll? Hopefully you say never, or you say rarely. For me it was rarely. The only time I used the scroll was to access my sniper rifle. That’s about the only time. I used one of my thumb buttons to pull out my shock rifle, the other thumb button as my hammer jump. I used to backslash key to select my best weapon. ((My keyboard as the backslash key right next to the arrows.) I changed my settings. I created a keybind. I guarantee most top players have a keybind like this. Here is the keybind from my user.ini.
MouseWheelDown=SwitchWeapon 3 | SwitchWeapon 5 | SwitchWeapon 8 | SwitchWeapon 7 | SwitchWeapon 9
MouseWheelUp=SwitchWeapon 2 | SwitchWeapon 6 | SwitchWeapon 10 | SwitchWeapon 4
SwitchWeapon 1 = Relocater/Impact
SwitchWeapon 2 = Enforcer
SwitchWeapon 3 = Bio
SwitchWeapon 4 = Shock
SwitchWeapon 5 = Pulse
SwitchWeapon 6 = Ripper
SwitchWeapon 7 = Mini
SwitchWeapon 8 = Flac
SwitchWeapon 9 = Rocket
SwitchWeapon 10 = Sniper
Lets look at MouseWheelUp. This is basically how it works. I scroll the mouse wheel up and starts the bind. Basically it selects the last weapon on the bind if I am carrying it. So I moved the scroll mouse up. First thing it does is checks to see if I have the ShockRifle(SwitchWeapon 4 = Shock). If I have the Shock then it will pull that weapon. If I don’t have the shock, it will pull up the next weapon, Sniper(SwitchWeapon 10 = Sniper). If I don’t have the Sniper, it does next in line. The other cool feature is this. It will switch between your top two weapons So lets say I have both the Shock and the Sniper rifle. I scroll up and I get the Shock, I scroll up again and I get Sniper, up again and I have shock. I grouped my weapons into two groups, close range, and far. Shock is my main weapon, so I binded that first. And I would take Sniper over the others. Now for scroll down I have it binded so that I use Rockets, Mini, Flak, Pulse, Bio. In that order. My two main close range weapons are Rockets and Mini, I would switch between those two. If I don’t have both, it will go to Flak and Pulse. Now there is a downside to this setup, but I think the benefits far out weight it. The cool thing about this bind is that its very easy to get used to, because people are used to switching weapons with the scroll. The also cool feature is that it may free up some keys for you. The two is freed for me are 1 of my thumb buttons, and my backslash key near my pinky.
Throw Weapon
Little note. Some people don’t use the “throw weapon” option. Lets say you are on Bollwerk. You are defending the base and your shock rifle has 3 rounds. Throw that weapon to the ground, and pick up a new one. Bam, 20 rounds again. Little things like this make a huge difference. Dont you hate it when you start a shock combo that you know is going to kill the FC, but you ran out of ammo to finish it ;-).
Also like to give the hammer bind to those of you who don’t have it.
Aliases[26]=(Command=”GetWeapon BotPack.ImpactHammer | Button bFire | OnRelease Jump | Fire”,Alias=ljump)
alt=ljump
Basically you set a bind to a name. Look after Alias[26] it basically says this…. Pull out Hammer, Rev it up, jump, the second you jump hammer for extra height. So it binds all those commands into the name “ljump.” Then you set ljump to a key such as alt, or whatever you would like it to be.
Remove Smoke trails from Rockets…
Aliases[32]=(Command=”set LightSmokeTrail bHidden 1 | set UT_SpriteSmokePuff bHidden 1 | set UTSmokeTrail bHidden 1 | set rockettrail bhidden 1 | set RocketMk2 DrawScale 0.03 | set RocketMk2 RotationRate (roll=0)”,Allias=RemoveSmoke)
Zoom key for people that use for higher FOV’s
Aliases[27]=(Command=”FOV 90 | OnRelease FOV 130″,Alias=szoom)
This will let you switch back to fov 90, and when you release the zoom button, set you back to fov 130. You can change this to any setting you want though.
The following binds I got from http://www.esreality.com/?a=post&id=155604 – This is what they do…
-Stop weapons shaking screen when fired
-New kill/death messages
-No Minigun Tracers
-No Carcasses
-No minigun/sniper/enforcer bullet shells.
-No ‘haze’ when underwater
-No minigun wind up/down sounds
-Different (low polygon) Teleport / Translocator Effect
-Coloured Teamsay
-Stops pickup messages from filling up the console.
-Messages to confirm it all works.
Aliases[28]=(Command=”set ut_eightball shaketime 0| set ut_eightball shakemag 0 | set ut_flakcannon shaketime 0 | set sniperrifle shaketime 0 | set minigun2 shakemag 0 | set minigun2 shakevert 0 | set minigun2 shaketime 0 | set pulsegun shakemag 0 | set pulsegun shakevert 0 | set enforcer shakemag 0 | set enforcer shakevert 0 | set ripper shakevert 0 | set ripper shakemag 0 | set ut_biorifle shaketime 0 | set shockrifle shaketime 0 | set WEAPON_SHAKING_INITIALIZED | set ut_shellcase bhidden 1 | set mtracer bhidden 1 | set chnullhud escmessage [Weapon Shaking Disabled] | set chip drawtype dt_none | set mtracer lightradius 0 | set uwindowconsolewindow windowtitle UT Console – Weapon Shaking Disabled! | set minigun2 Misc1Sound none | set teamsaymessageplus greencolor (g=255,r=255) | set teamsaymessageplus lightgreencolor (g=255,r=255) | set teamsaymessageplus cyancolor (g=0,r=255,b=0) | set localmessageplus bisconsolemessage 0 | set translocator selectsound utmenu.speechwindowclick”,Alias=optimise)
Aliases[29]=(Command=” set waterimpact bhidden 1 | set enforcer Deathmessage %k killed %o with %w | set ut_biorifle Deathmessage %k killed %o with %w | set shockrifle Deathmessage %k killed %o with %w | set pulsegun Deathmessage %k killed %o with %w | set minigun2 Deathmessage %k killed %o with %w | set ut_flakcannon Deathmessage %k killed %o with %w | set ut_eightball Deathmessage %k killed %o with %w | set sniperrifle Deathmessage %k killed %o with %w | set impacthammer Deathmessage %k pwned %o with %w | set translocator statusicon i_teamn | set translocouteffect drawtype dt_sprite | set translocouteffect texture botpack.womanbelt | set shockbeam rotationrate (roll=0,pitch=0,yaw=0) | set waterzone viewfog (x=0,y=0,z=0)”,Alias=opt2)
Aliases[30]=(Command=”set TFemale2Carcass bhidden 1 | set TFemale1Carcass bhidden 1 | set Tmale1Carcass bhidden 1 | set Tmale2Carcass bhidden 1 | set TBossCarcass bhidden 1 | set UTMasterCreatureChunk bhidden 1 | set UTPlayerChunks bhidden 1 | set UTLiver bhidden 1 | set UTHeart bhidden 1 | set UTStomach bhidden 1 | set UTTeleportEffect bhidden 1 | set pickupmessageplus bisconsolemessage 0″,Alias=otherstuff)
X=optimise
y=opt2
z=otherstuff
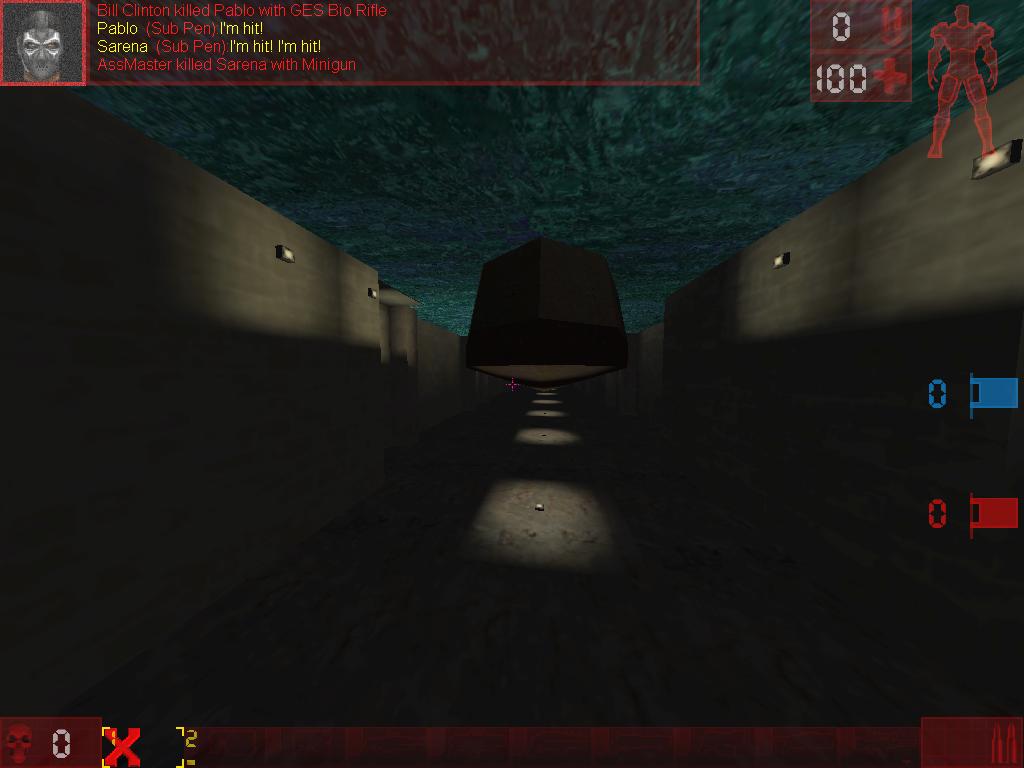
This is what it looks like…Before and After
This is what it looks like after, notice the team chat stands out with its new color.
Set these 3 binds to keys, then press the keys before joining the server. Press escape to get to the black UT screen, and press the 3 keys. It will enable them. I personally dont use this water clearing hack, but I think the colored teamsay is great.
The person that created the above binds also released this tweaks file that chages other UT visuals… Tweaks
After you download this file, put the file in the system folder. Hit the esc button to get to a black screen. While in that black screen, hit the console key and type in: exec tweaks.ini Then hit enter. It will give you a little message sayign “tweaks loaded”.
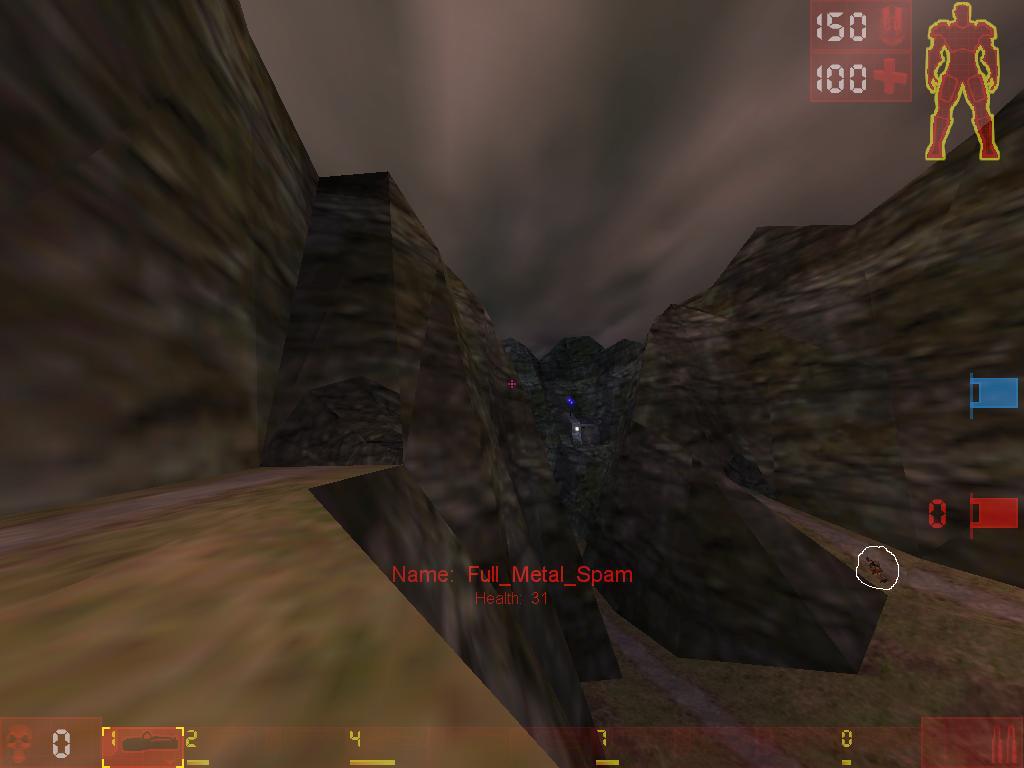
Coronas
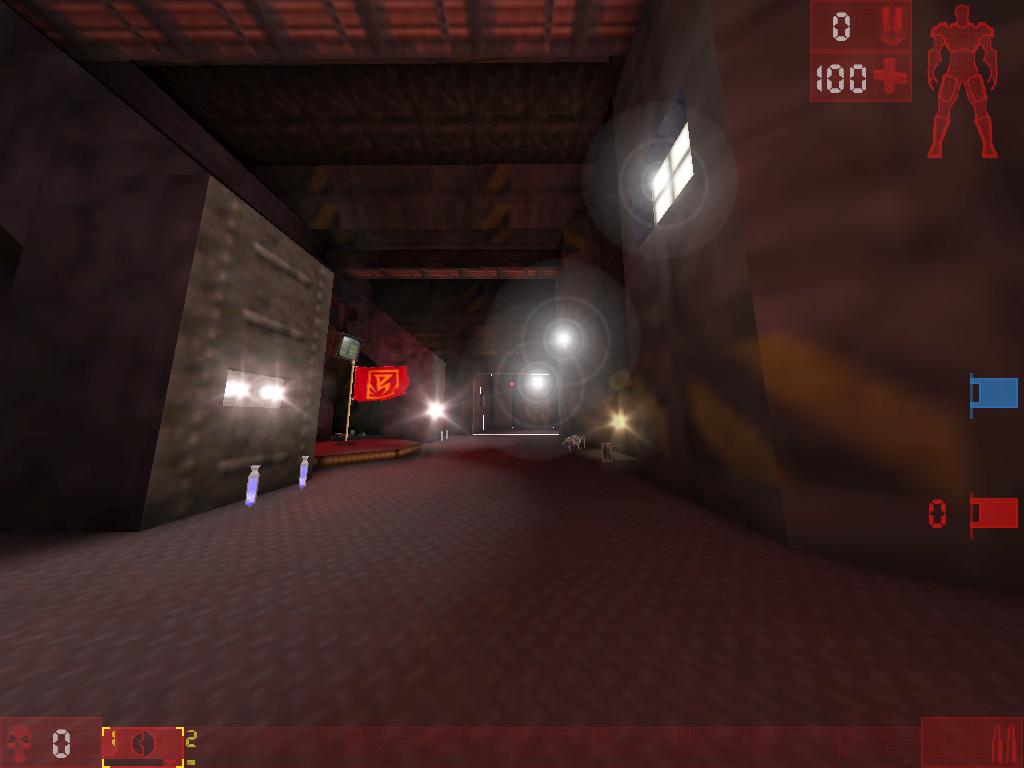
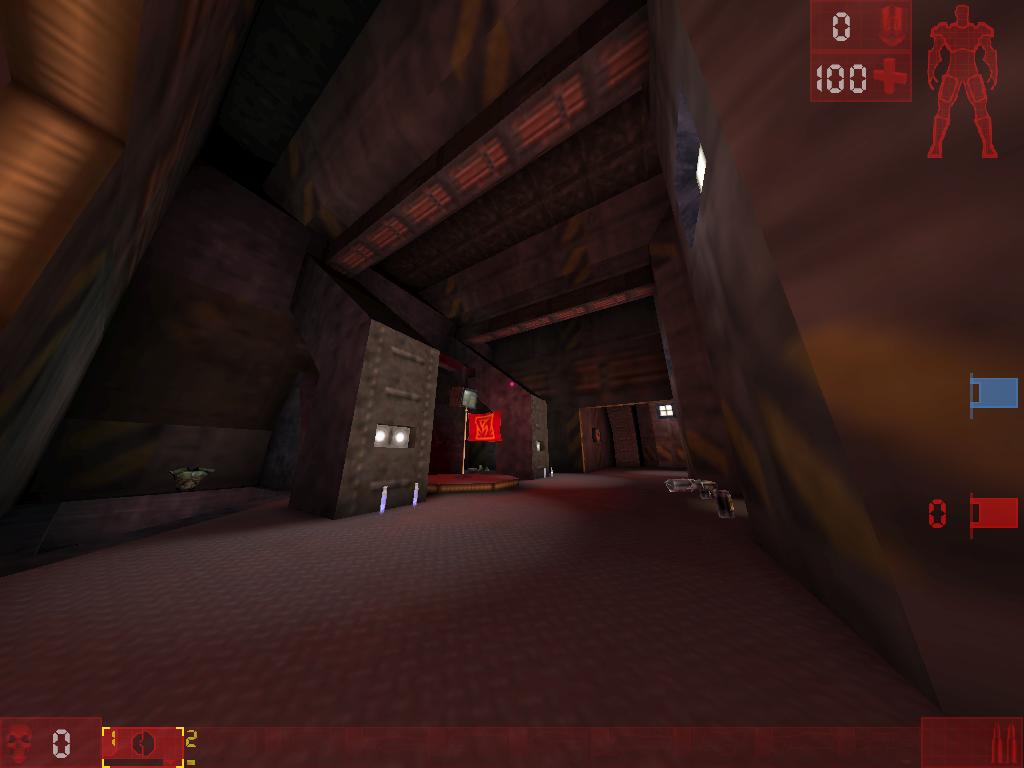
Coronas just flat out get in the way. They obstruct your view in a number of maps. I am going to use Lucius as an example because it really shows what a difference it makes to turn them off. This is what Lucius flag room looks like with the Coronas on.
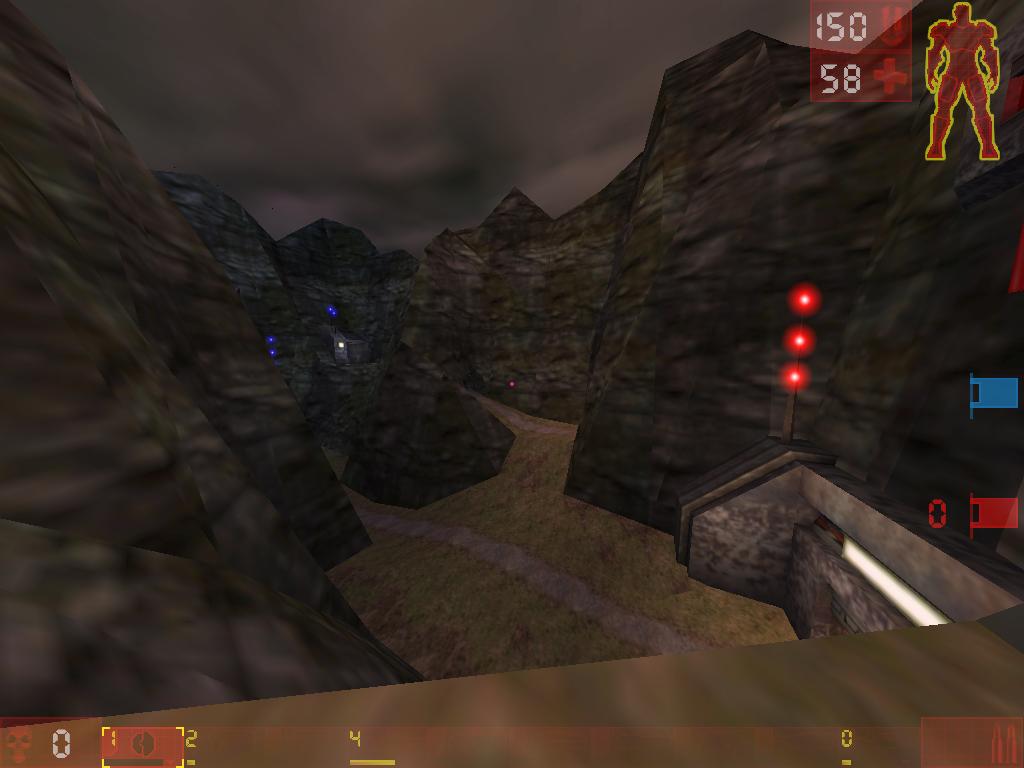
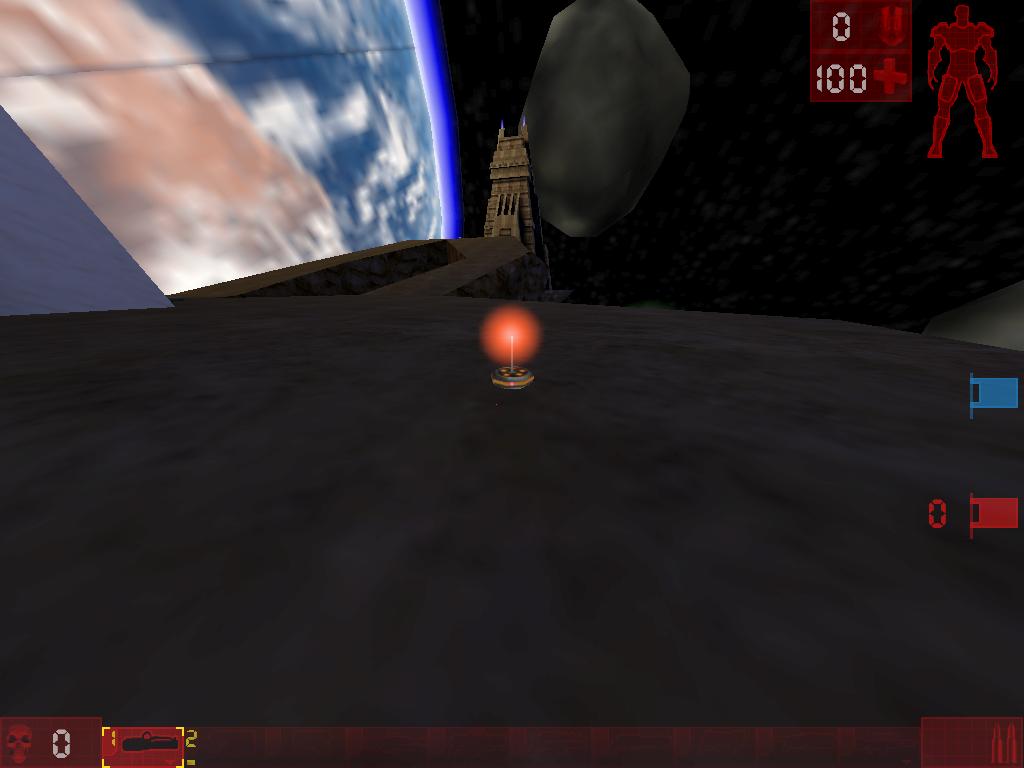
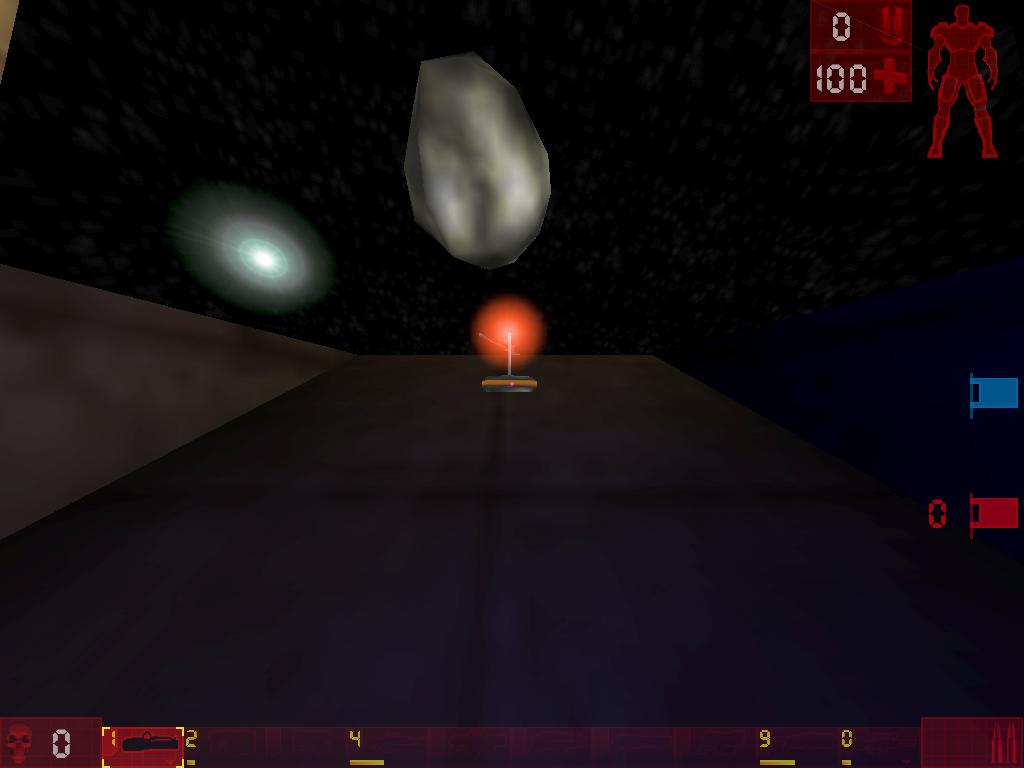
And here is what it looks like with the Coronas off….
To turn off the Coronas go into the UT console and type preferences. Under rendering you will select either D3D or OpenGL. Whatever you are using, that you should see the option to turn off coronas.
Hammer Throwin.
You can use your hammer to toss your Flag Carrier in any direction you want. First I will give you the instructions, then show you screenshots of how it works. We will use Terra as an example. First thing you do is point to where you want your teammate to fly. Pull our the impact hammer and right click at that spot. As soon as you right click, you left click and hold so the impact hammer is charged. Put the hammer in a direction that will make it easy for your flag carrier to dodge into, and send them flying.
Right click here….
Left click and charge the hammer. Point it a little closer to the left so your flag carrier can dodge into the hammer. Keep the hammer charged, have the flag carrier dodge into it, and away he goes. If the flag carrier rides the walls he will get better distance and take no fall damage. This sends the Flag Carrier all the way to the base entrance.
So you are saying this…does it really make a difference if I do the right click first? Well YES! That right click aims where he goes! Lets say I right clicked here….
Look where he lands…..
You can do this on a number of maps. Lets say your teammate is charged where the Deemer is on Face. You can grab the flag. Port to where the deemer is, and your teammate will shoot you to mid map. This can be useful on many maps, play with it, its fun.
Launching Translocator
This is pretty simple. Charge your hammer and put the crosshair on the yellow line of your translocator, release and watch it fly.
Land Here
![]()
Hit Here….
Land Here…
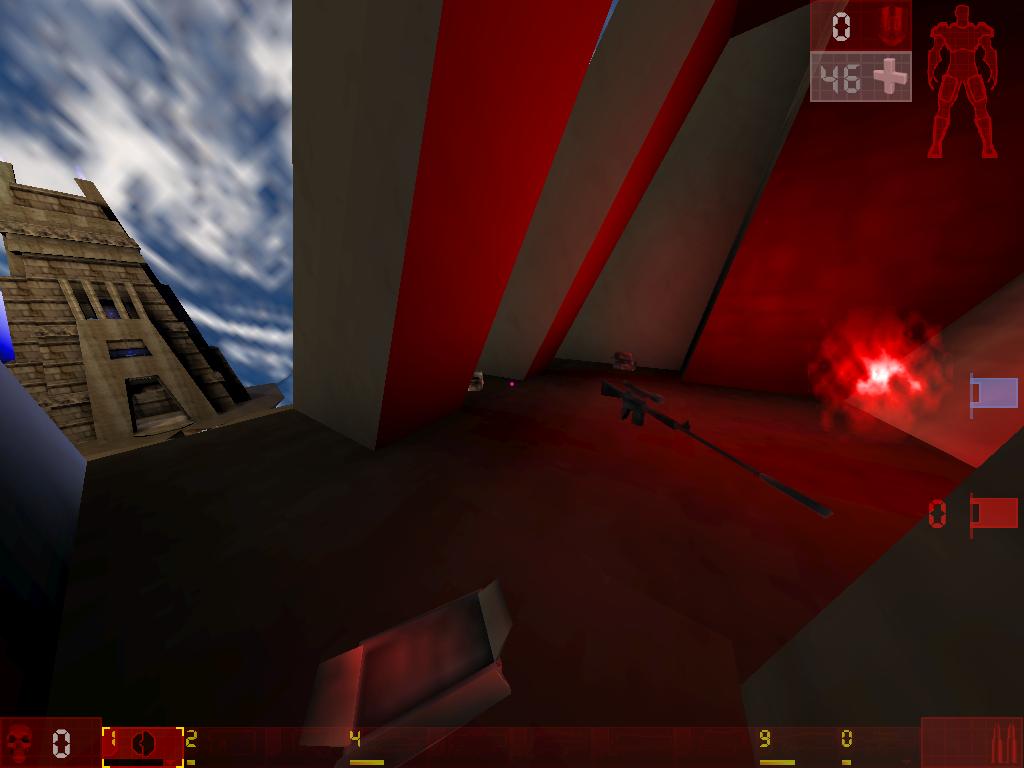
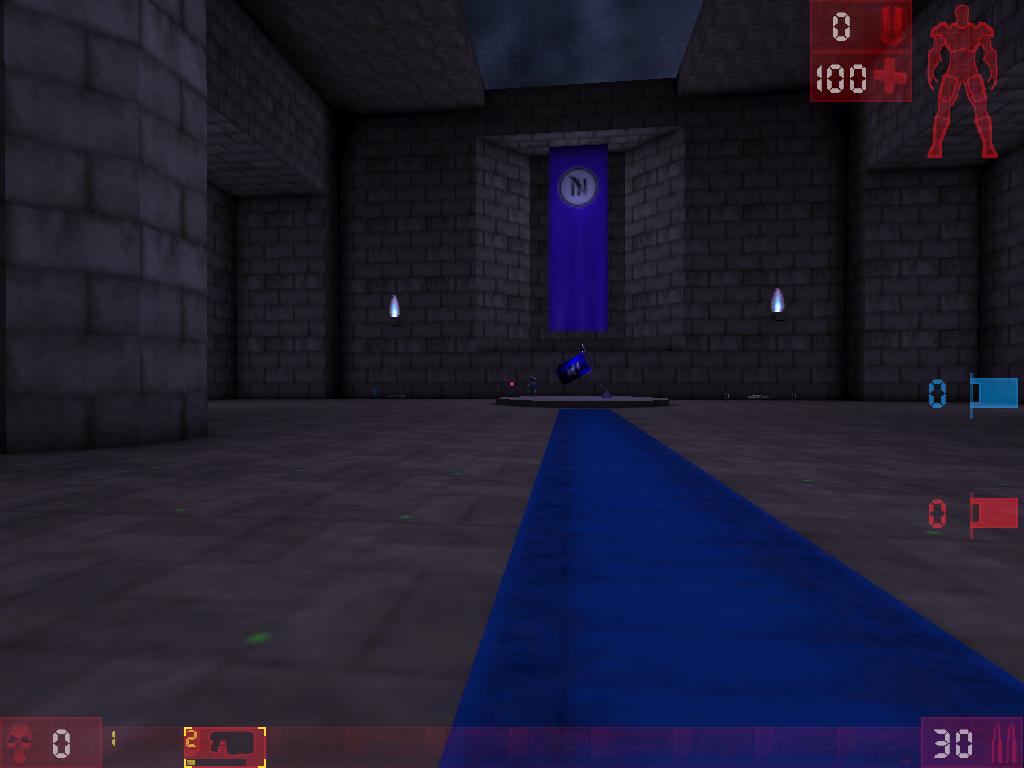
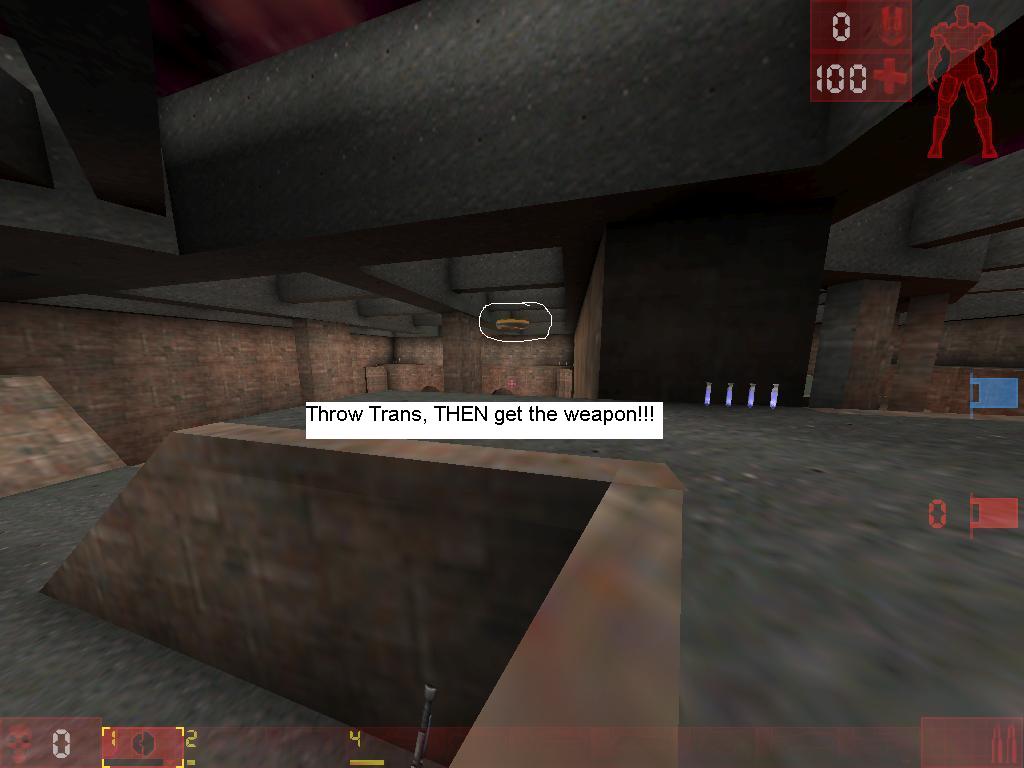
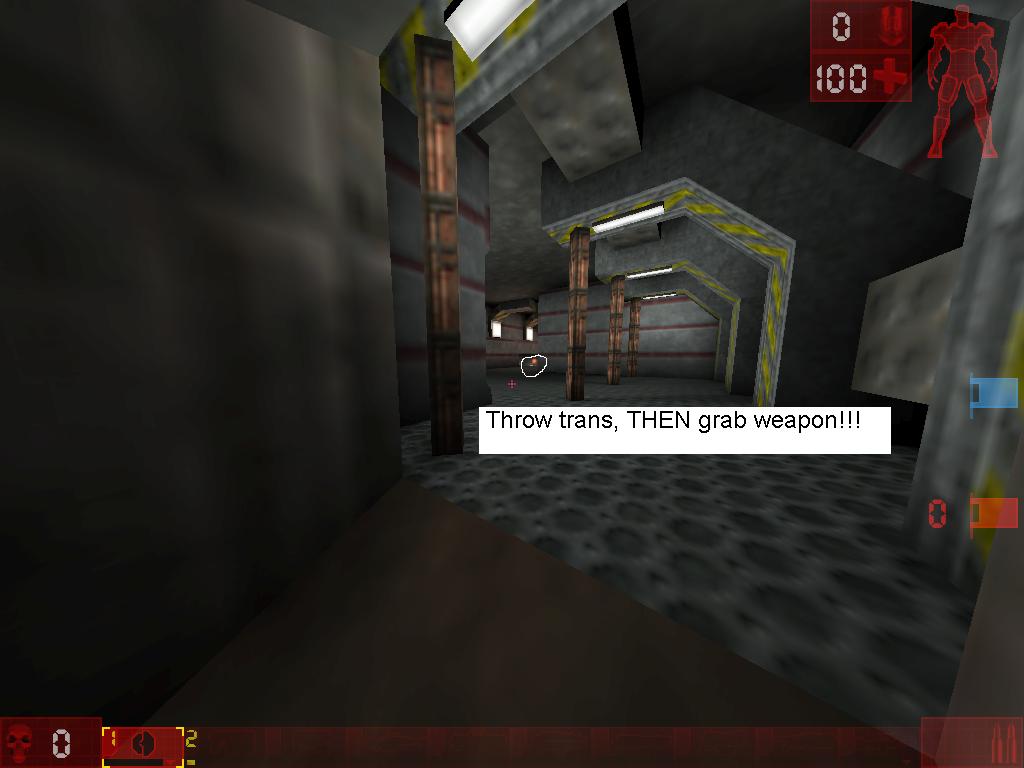
Smart Translocating
Lets say you are playing defense on Bollwerk. You are a shock whore and just died, the enemy flag carrier is leaving the base and you need to quickly grab the shock rifle to chase him down. If you look at my screenshot here, what you want to do is shoot your translocator to the front of your base, then go and grab the weapon. I have seen countless times people drop to the shock rifle, then translocate over the wall, this takes precious seconds logner. I also see people making this same mistake on Coret. Throw your trans, then go into the room and get the the rocket launcher, you are wasting valuable time running in and out of the room.
Conclusion
I know some of you deem these things immoral. Would I like to see UT go straight edge? Sure I would. But as long as its legal, I want to be competitive. With this page I would like to show many of the tricks beginners dont know about UT. I would love to hear from anyone that learned anything new that has helped them. And if you have any tips, please share them.
Special thanks to SamD for his crosshairs and Nexx for his UT altering keybind
Hey, good flashback. I see they’ve made a remake of UT. Just telling the kids about us and found this…. Lol
Out- Pebbles
Hey Pebbles! Good to hear from you, talk to anyone from ZB anymore?